How to Build Your Own Website Step by Step
One of the easiest ways to start a business today is through creating your own website. Moreover, if you can handle using Microsoft’s Word processing platform, you can handle creating your own website. With that being said, today you will learn how to build your own website step by step. As a quick summary you must first, pick a hosting platform, choose your domain name then install the ever so popular content management system, wordpress. After those things are done, you simply need to choose a free theme then your website will be live. Once those things are done, you will have a website to start adding content to. If you said you can handle writing in “Word” then let’s get started.
Numbered Steps:
- Pick a Host
- Choose a domain name
- Install/login to Wordpress
- Choose a Theme
- Change settings
- Website Created
- Building on Your Foundation
1. Pick a Host
The first thing we need to do to start our website is pick a hosting service. The hosting service is the company who will allow your website to stay online nearly 24/7. The way this works is, instead hosting your website on your computer which you may power off daily, we host and build your website on someone else’s computer which is designed specifically for public websites. I will tell you step by step how to sign up for a particular hosting account but, the site may rearrange their sign-up fields so, I will use images and terminology based on how their website looks today.
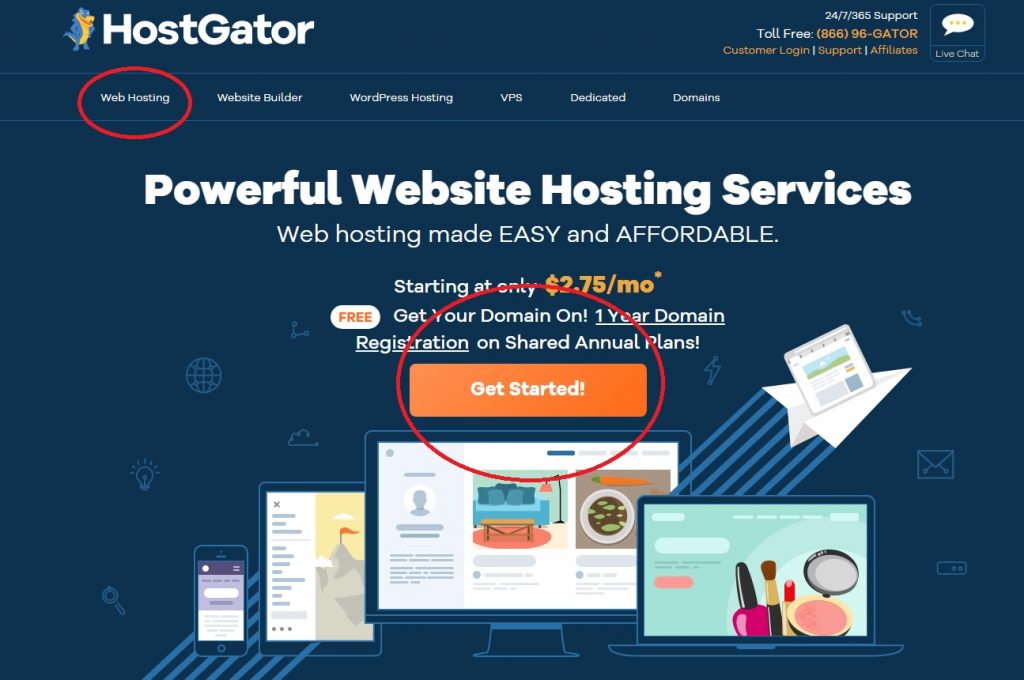
For our first website, we will be using Hostgator. Visit HostGator and start the sign-up process. At the time of this post you can either click “Web Hosting” in the menu bar or “Get Started!” on their homepage.
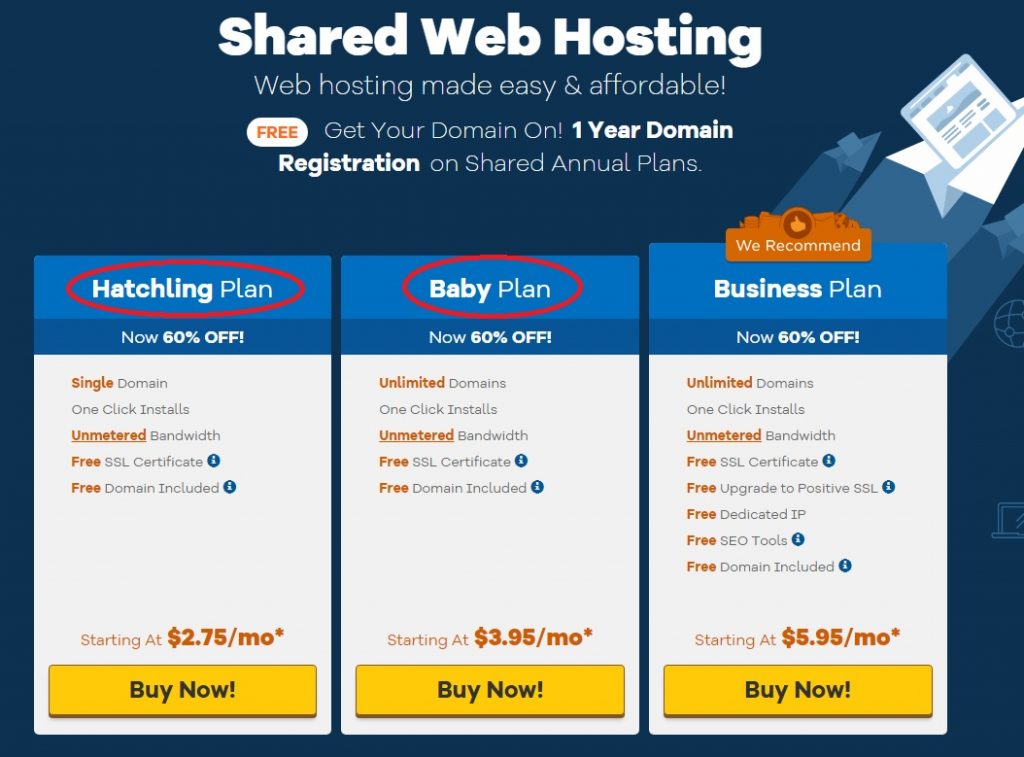
Next, you will have to choose a package. Each package has different perks which you can see within each. Personally, I use the middle plan which is called “Baby Plan”. I use this plan because I knew I would like to build more than website so the baby plan was perfect since it works for unlimited domains. If you believe you will only build one website ever then, the “Hatchling Plan” will before you.
2. Choosing a Domain Name
Now that you have choosing a plan, we can now fill in our personal information and select a domain name. Your domain name is the name of your website. For example, if you wanted to share your wisdom to the world for free, you might want your domain name to be “www.cloudofwisdom.com”.
Domain Name Tips
When choosing a domain name, it is good to keep it short and simple. If at all possible, try to make the name relate to what your website will be about. As another example, if your website is about “keyboards”, it could be called “www.keyboardplanet.com”. The domain name “www.keyboardplanet.com” tells you what the site may be about and is simple enough to remember if someone was trying to remember a keyboard site they were on. Lastly, ensure you do not use other branded names like “SmartTesla.com or GoodTacoBell.com” or you will run into legal issues.
Adding Additional Services
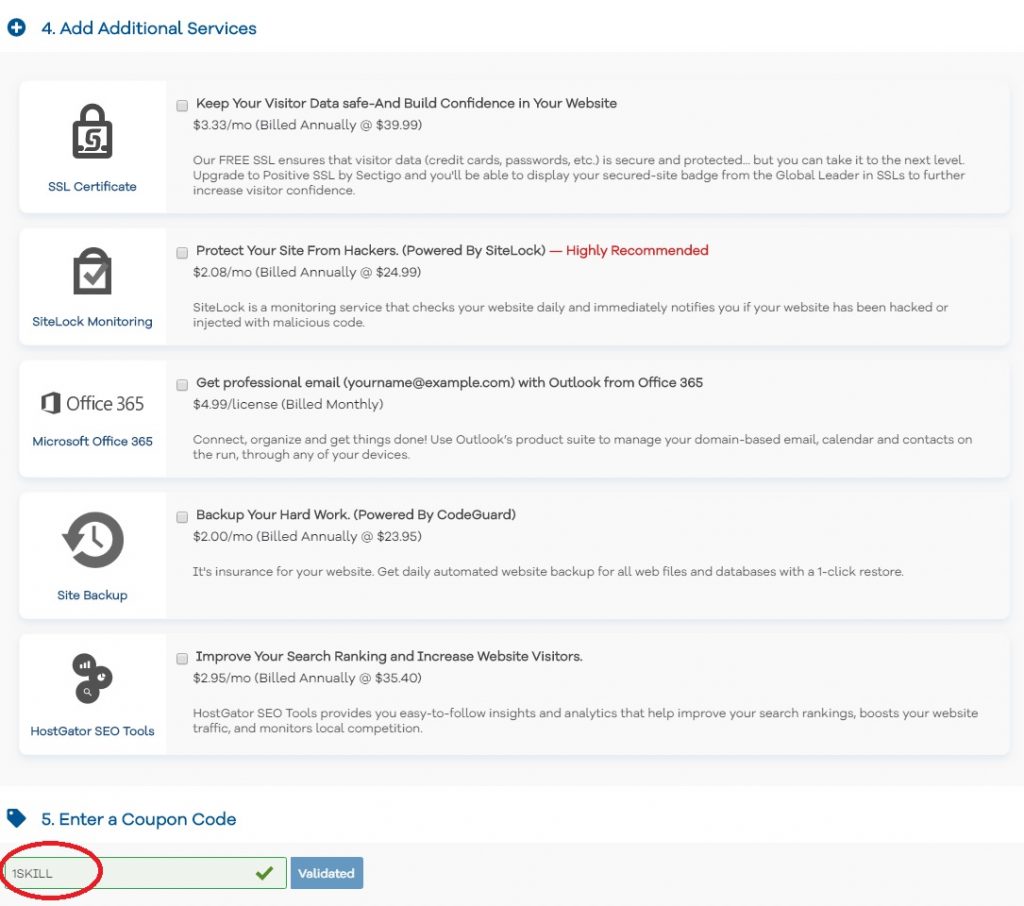
Once you pick your domain name and fill out your personal information, you may notice the additional services area. You only truly need the “SSL Certificate” if you plan to process other peoples payment information on your website. If you will not be processing payments right now, you can always add it later. SiteLock Monitoring is not completely necessary either. Your website will be fairly secure and will be more protect the fewer plugins you get later. I wouldn’t worry about getting the security at this time. Honestly, you do not need any additional services at this time. You can skip them all. Let’s get you a promo code instead.
Enter Your Promo Code
Use the Promo code “1SKILL” for a discount on your package.
3. Install and Login to Wordpress
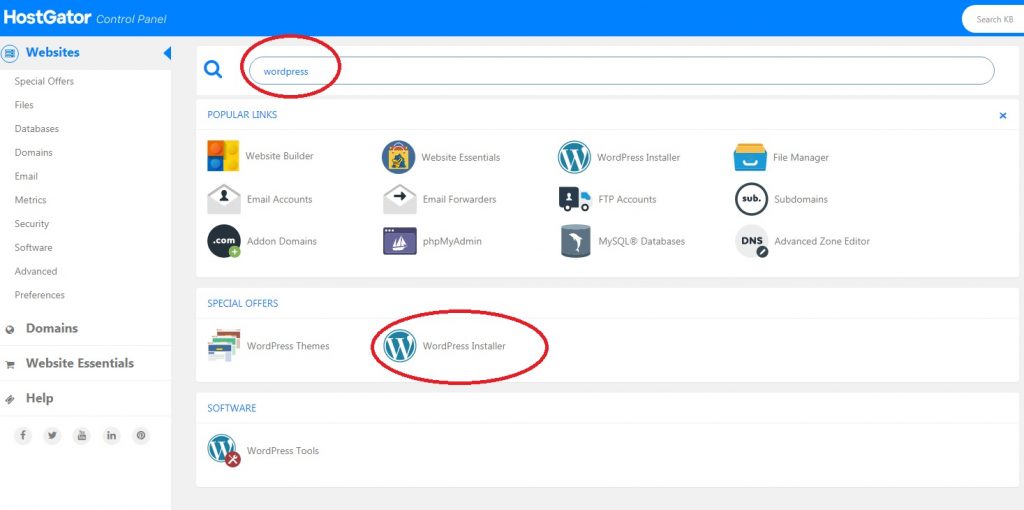
After you have finished selecting your domain name and purchasing your plan, we must now login to your website. Hostgator should have sent you an email with the username and password you created to login to their cpanel. The cpanel or control panel is where you manage your website on HostGator’s computer. We must login to the cpanel and look for “Wordpress Installer”.
How to Login to Wordpress
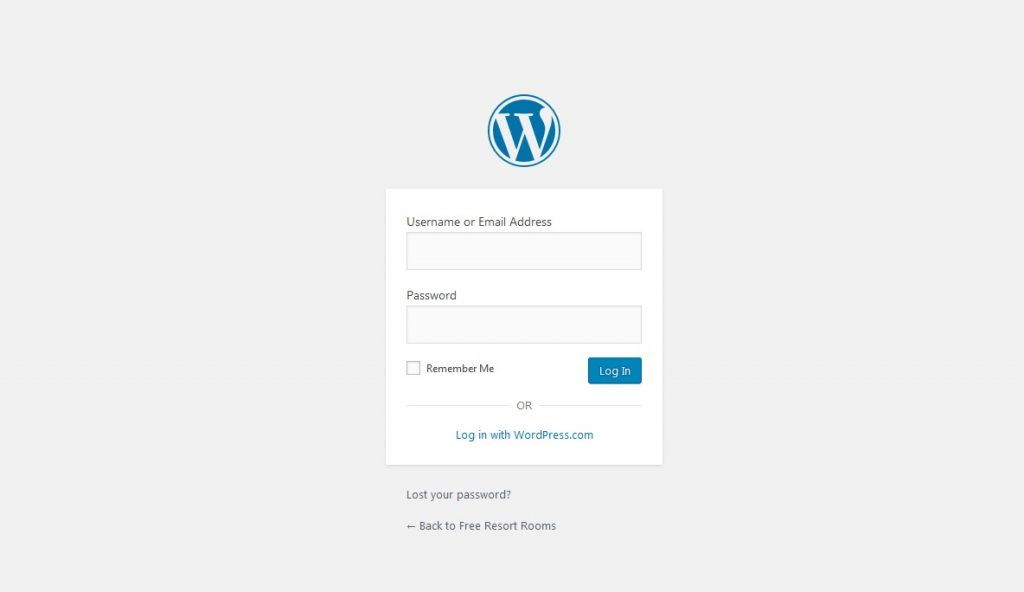
Once your installation is complete, you login to WordPress by visiting your “www.yourdomainname.com/wp-admin”. By adding “/wp-admin” to your domain name, it will take you to the wordpress login screen. Use your created username and password emailed to you have the wordpress installation was complete in the last step.
Once you login to wordpress, it should look like this. This is called the “WordPress Dashboard”. We will use this menu a lot.
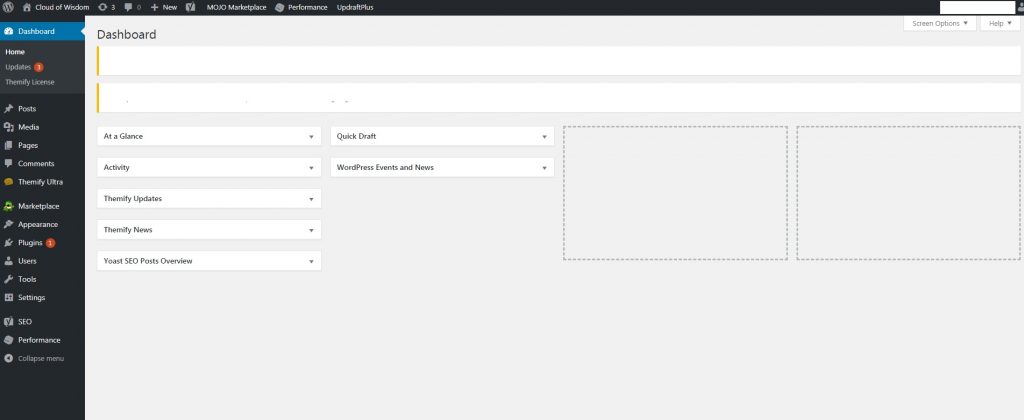
4. Choosing a Theme
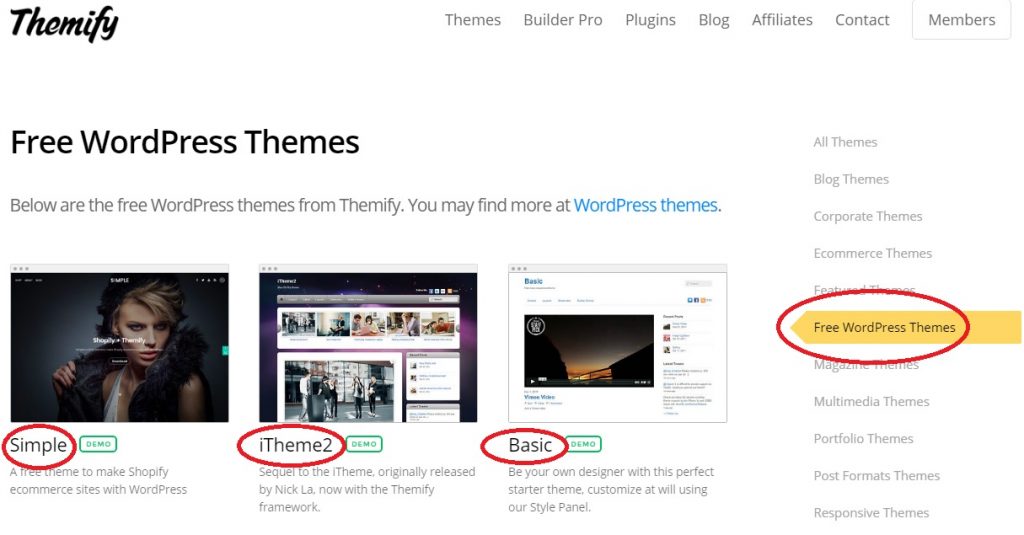
The reason we use wordpress is because instead of having to build your website from raw coding, a lot of the work is done for you already. One way that the work is done for is by using a free theme. Here is a link to the theme platform I use for every single website because it makes creating a website so easy. Pick one of the free theme’s in the center of the page.
Install Your Theme
Now that you have selected a theme, let’s installed it. Back to your Wordpress Dashboard, click on appearance on the left hand-side toolbar. After the page loads, you will see a button that says “Upload” at the top of the page. Click “upload”, then “Upload Theme” then “Browse” and point the search to the theme you downloaded to your computer. After you select your theme, click install. Once the install is complete, you can now start using your theme to create pages.

5. Change Wordpress Settings
Now that you have your theme selected, let’s get a few settings the way we want them before we start creating pages. On the left hand side of the Wordpress Dashboard, click the settings tab. A dropdown menu will show a list of items to include: general, writing, reading, discussion and permalinks. I will be covering only the important options with you. The rest you can change how you see fit.
Permalinks to Post Name
If we do not change your “permalinks” settings now, you may regret it in the future so let’s make that change first. In the setting drop down menu on the left side of the wordpress dashboard, click “Permalinks”. Now select “Post name” as the “Common Settings” option.

Finishing Settings
The “permalinks” setting was the most important to update before you start adding content to your website. Feel free to revisit the rest of the setting and change the options to what may seem right for your website.
6. Website Created
Now that your settings are good. Let’s create our first page on your website. Since you may have a premade homepage from the theme you selected, let’s make a custom contact page.
Click pages on the left-hand side of the WordPress Dashboard, then “Add New” at the top. You should end up on a page like this.
Add a Title
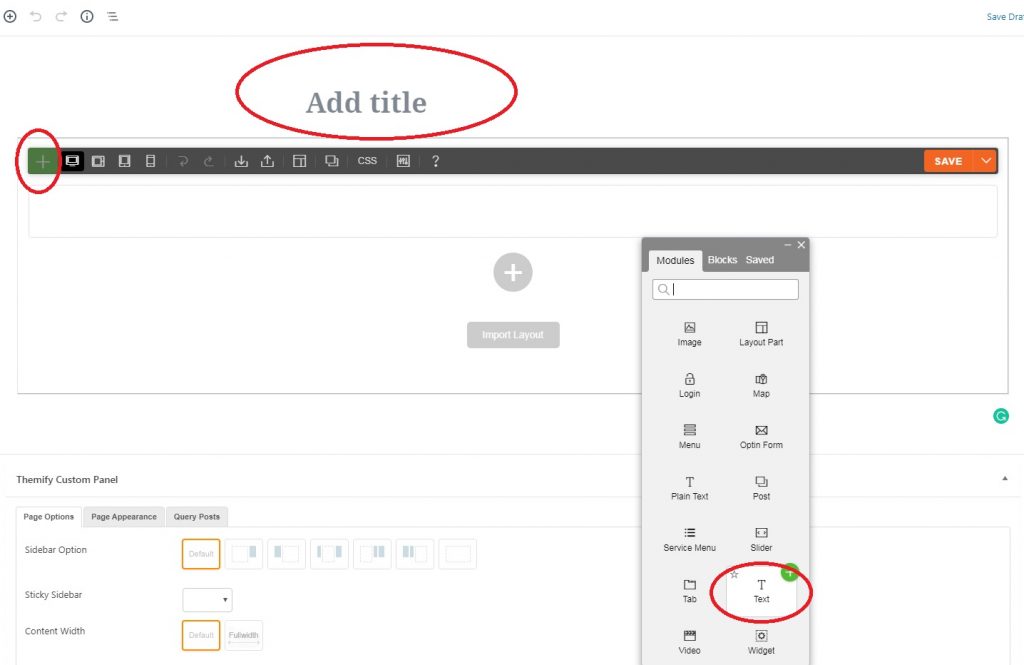
Since this will be a contact page, let’s first start by adding a title in area labeled “Add Title”. You can just type “Contact Us” in the “Add Title” field.
Adding Some Text
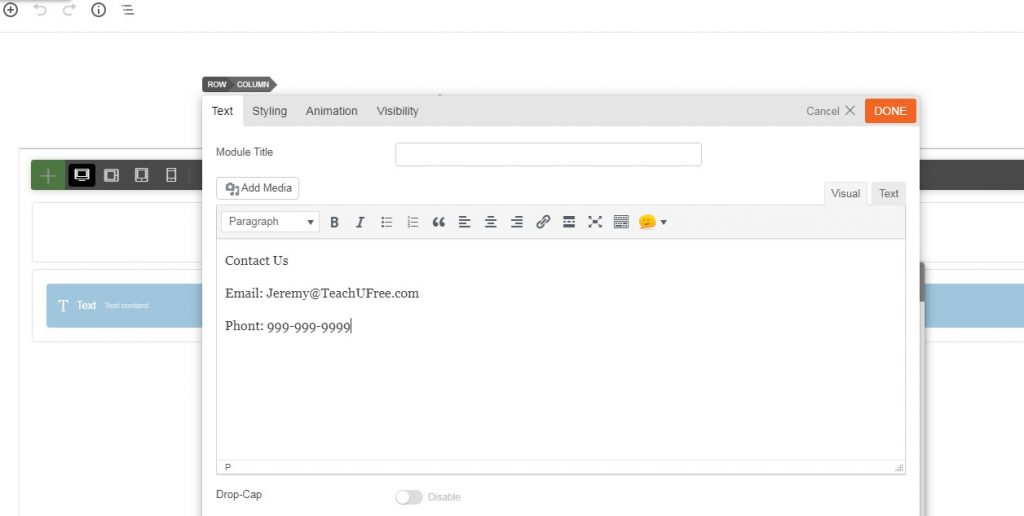
Click the green “Plus” symbol to see what types of things you can add to your page. Let’s start with the “Text” block to enter some text. This will open a Microsoft “Word” style writing space where you can type anything. I will enter same sample contact data for this example. Once you enter your contact info. Click “Done” or “Save” in at the top or bottom of the text window.
Adding a Background Image
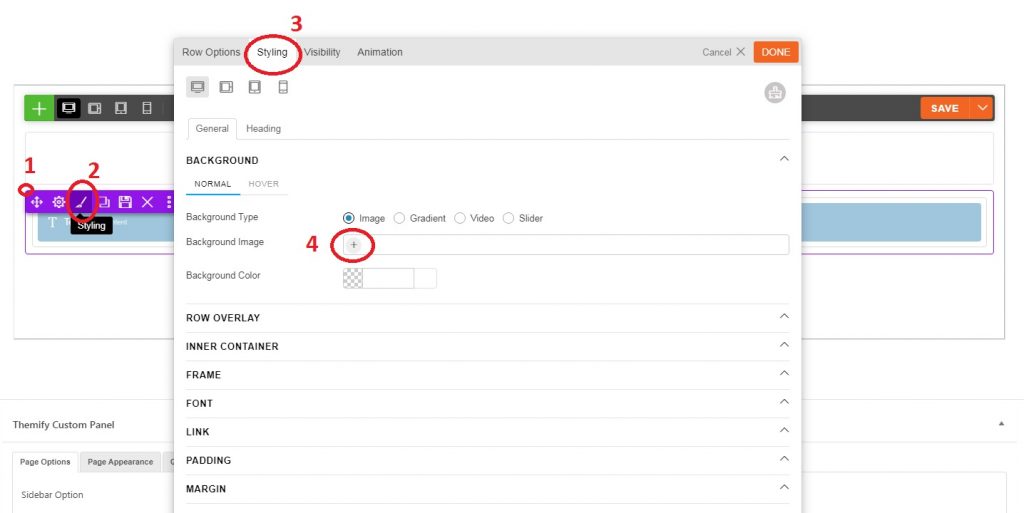
Now that we have some text, let’s add a little color to our page with an image. I will be using a picture of a red phone as my background which you can find at this link. If you can not find the same image, feel free to use any background you like for practice. As a quick tip, be sure you use the “Medium” file size or smaller as the image quality because larger images slow down your website.
Simply click the “+” symbol inside the “Background Image” item under the “BACKGROUND” dropdown menu as seen for step one in the image above. Select the file that you downloaded and it will be set as your page’s background. Once that is complete, let’s take a look at what we created.
Click “Publish” at the top right hand corner of the Wordpress Dashboard. You may have to press it twice to confirm you are ready to publish your page. After the page is published, you should see a “View Page” shortcut appear in the top left-hand corner of your page. Click the “View Page” shortcut to visit your page.
Working on the Frontend
As you can see, our contact page is not finished. However, we will now make the final changes on the “Frontend” so that we can visually see what we are doing.
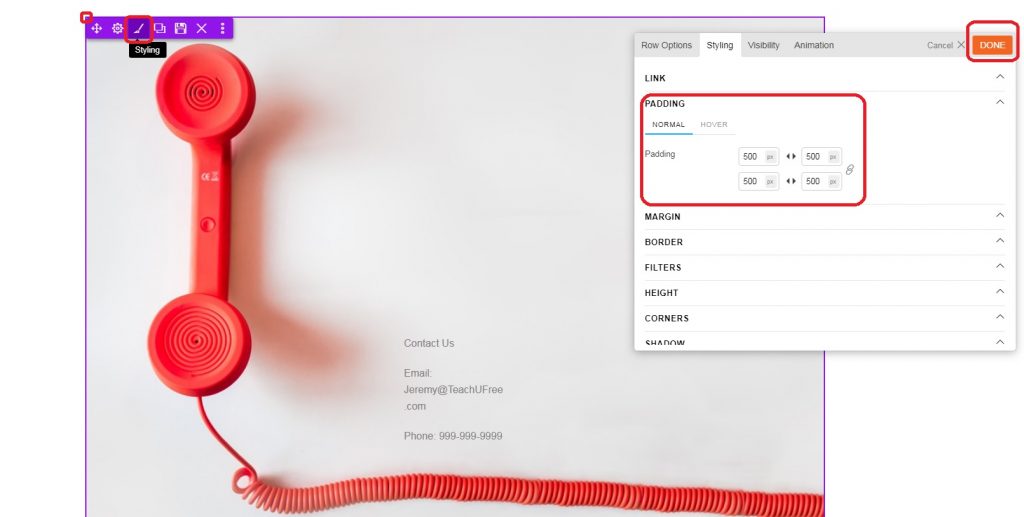
Click the “Turn On Builder Button” located in the image above. Now you will have the ability to make changes and see them in real time. Let’s start by adding “Padding” to our text block to make our background image show better.
Hover over the top left corner of the text block to show the dropdown menu and click the paint brush that says “Styling” as shown in the image below. Click the “Styling” tab in the newly opened window then scroll down and click”Padding” to show the padding options available. The image below is my result after adding 500 pixels of padding to every corner.
Practice and Experiment
Since your background image and style will be completely different from mine, feel free to tinker around with all of the options available to you for editing your page. The editor you have been using thus far is pretty user friendly. The more you practice and make changes with it, the faster and more creative you will become.
Unfortunately, this post would never end if we tried to cover every single possible edit available to you so, have fun and look forward to the learning experience. At this time, you have a website and now you are able to design it the way you want. Move to the next step when you are finished editing your contact page.
Adding a Page to the Menu Bar
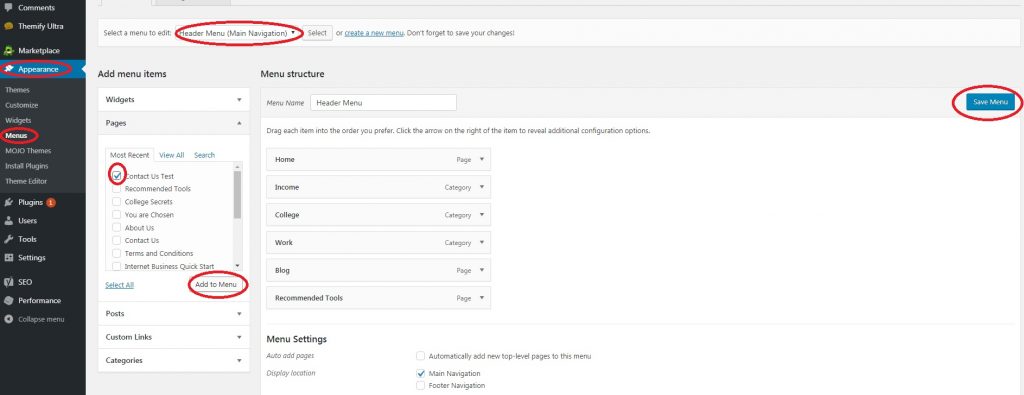
Now that your contact page is complete. Let’s add it to your homepage menu bar. In the Wordpress Dashboard, hover over appears on the left-hand side then click “Menus”. One you are on the “Menu” page, click the “Pages” tab on the left-hand side and choose the page you created by clicking the empty box near your page’s name. Then click “Add to Menu” for it to appear in the menu on the right. Click “Save Menu” at the top right-hand corner to save the changes. You’re new page will now appear in the main menu of your website.
7. Building on Your Foundation
Up until this point, you should have gone from having no website to having your very own selfmade domain name. If you made it to the end of these steps, congratulations on building your first website and getting your internet brand off the ground. Moving forward, you have been given a foundation to start working on building your website to your liking. Continue to get familiar with WordPress and adding content to your website.
If you ever get stuck, HostGator has 24/7 support contact information on their website. In addition, if you’re trying to add certain things to your website, be sure to check out more websites who will teach you the processes to include YouTube.
If you would like more free tips and tricks like these, check out our email list through this link. Wisdom is shared here.

