How to Collect Email Addresses on WordPress
So you have a website and you’ve been hearing about this thing called an “Email List”. Well today, you’ll learn how to put one get an email capture form online using a WordPress site. As a quick summary, to collect emails in WordPress, you must simply get an email responder and post your email capture form into your desired location. Once you have posted your email capture form, you will be able to collect the emails from any interested prospects and contact them in the future.
Why Collect Email Addresses
First off, let’s cover why email capture is good for your website or brand. When someone finds you online, they may only see your site once in their lifetime. However, if you collect their email address, you can follow up with them to re-engage. Depending on your business, your re-engagement can be for brand awareness, to provide value or provoke an action. In our case, we allow anyone to sign up here to our email list to continue to receive tips like these sent directly to their email that why they have notifications about new content.
Choosing an Email Responder
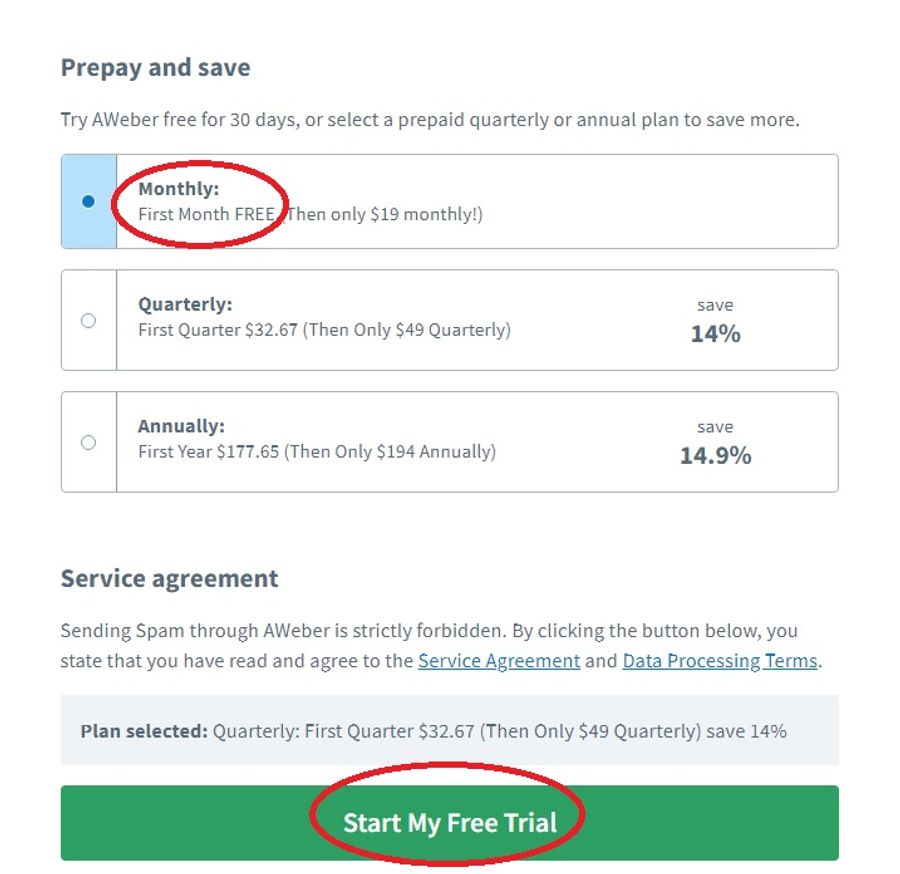
Now that we know why email capture can be helpful, let’s get started. For this demonstration, we will be using the same autoresponder hosting this website. We’re using an autoresponder called Aweber and have been using them for years now. One great thing about Aweber is, from the start, they have a free trial so go get that right now if you’re following along. You’ll see the free trial along with their monthly subscription. Once you’re all signed up we can get started with creating a form.
Creating a Capture Form
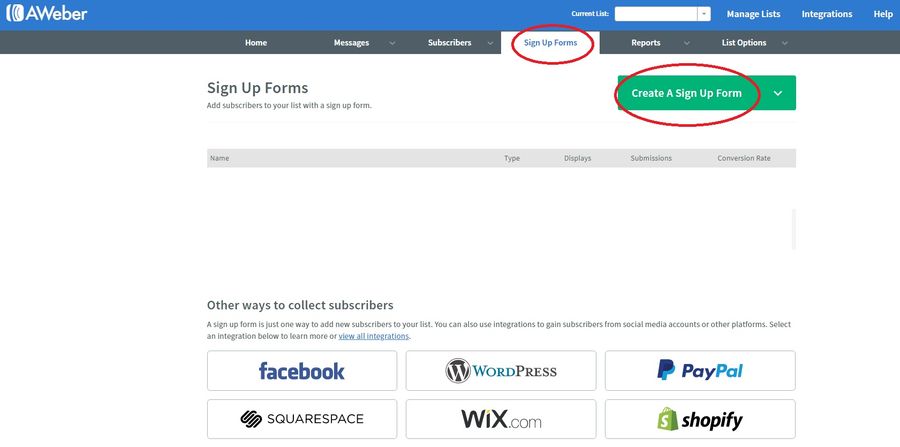
Now that you have created your account using the free trial from the link above, we can now create your first form. Click on “Sign Up Forms” in the top toolbar of the webpage. Then click on “Create a Sign Up Form” and “Sign Up Form” again from the dropdown menu.
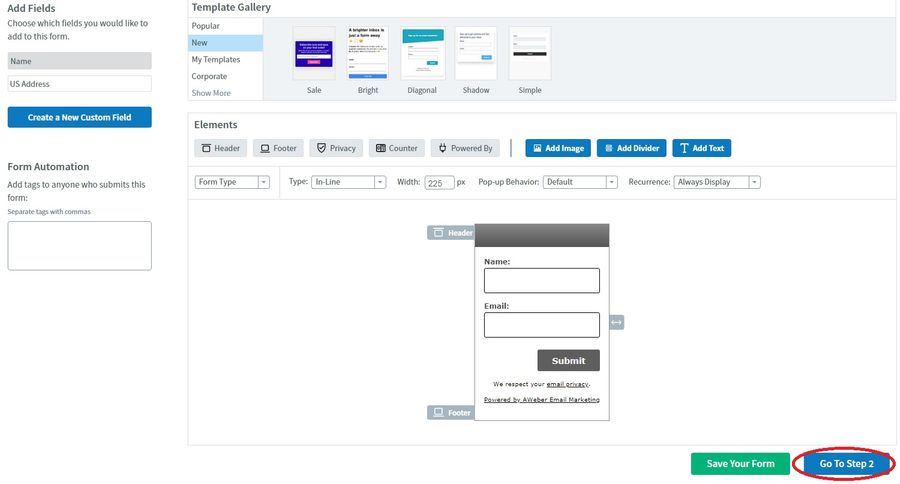
In the beginning, you might notice that you can collect more than email addresses by using “Create a New Custom Field”. In fact, you can collect anything that a user will type in. However, the fewer demands you make, the more likely the user will share their details with you so, try to limit what you ask for.
Choosing a Template
For this example, let’s just use the default form which is “Name & Email”. Instead of making edits to the form right now, let’s just cover how to get it posted on your site, then you can go back and put the time into customization. Click “Go To Step 2” to update your settings.
Form Settings
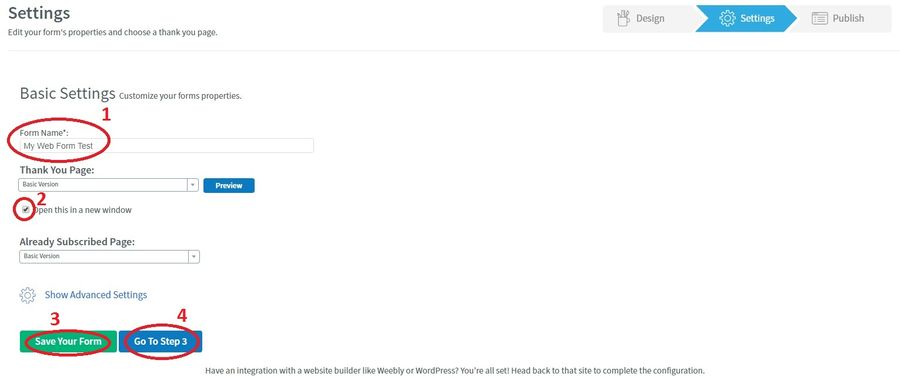
For the form settings, I am just changing the “Form Name” to “My Web Form Test”. Next I am “filling the box” for “Open this in a new window” which is for the thank you page to appear in a new tab once they sign up. Click “Save Your Form” then we can click “Go To Step 3”.
Publish
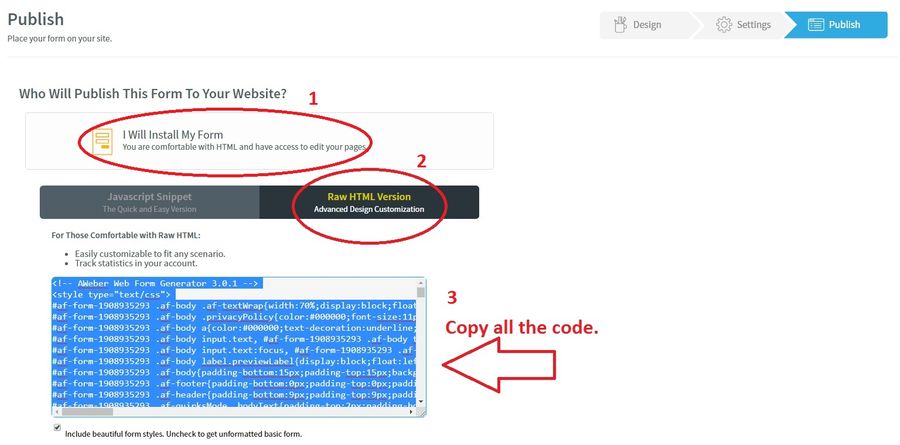
Once your on the “Publish” step, click “I Will Install My Form” then “Raw HTML Version”. You will then see the code appear which I have highlighted in blue in the image below. Copy all the code so we can paste it on your website.
Posting Your Form
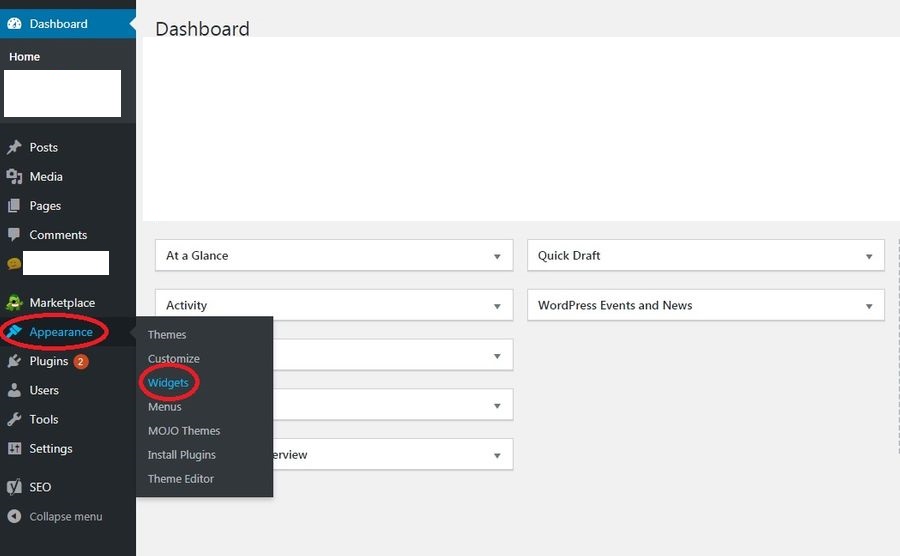
Once your form code ready, you can now find a location to post your form. You can create a standalone page for your form, add it to your sidebar or almost anywhere for that matter. All you need is the html code to make the form appear in your desired location. For this example, let’s put our forum in the sidebar. Click “Appearance” then “Widgets”in the Wordpress Dashboard.
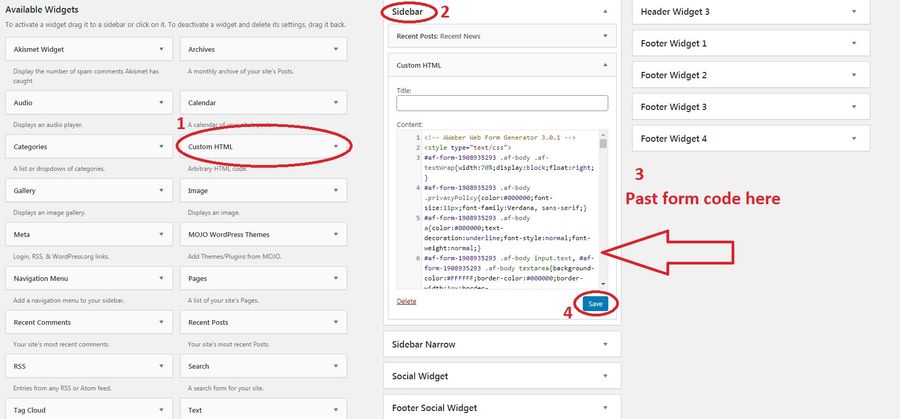
Locate the “Custom HTML” widget as shown in the image below. Drag or add the widget into the “Sidebar” tab on the right of the screen. Next, post your code in the “Content” field within the “Custom HTML” widget. Click “Save” to confirm the changes. If you have any issues saving, try using the “Javascript Snippet” code instead of the “Raw HTML Version” code.
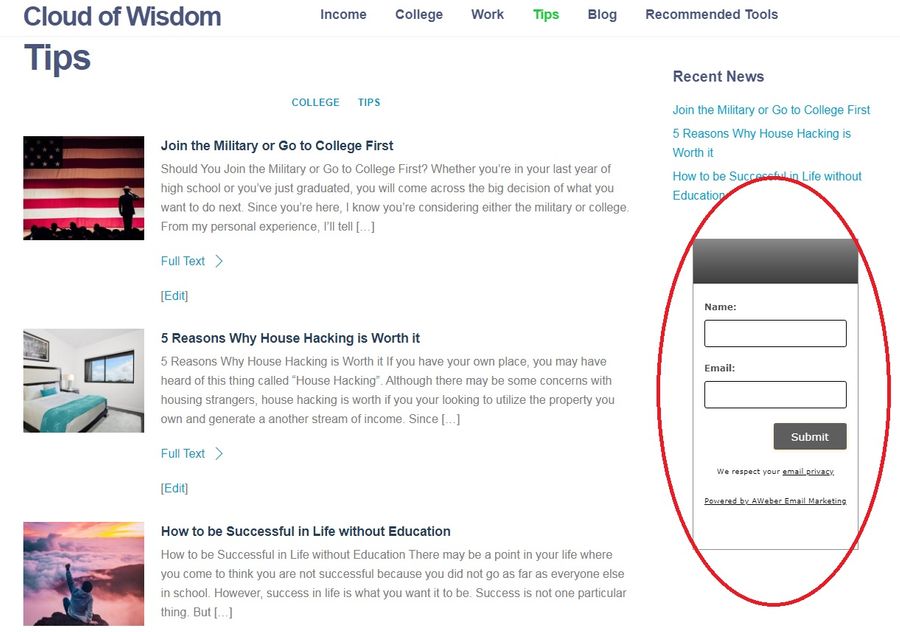
Now your form should be showing on any page that has as a sidebar.
Final Form Tips
In closing, try to limit what you asking your subscriber for on the forms. For example, instead of asking for the first and last name, if your business won’t be putting it to good use, just ask for the first name. Moreover, if you don’t need a name at all, you do not need to ask for it. Simply request what is needed in correspondence to what the consumer is expecting you will need. Using our site, for example, we offer to share content with subscribers so I do not need a first name, last name and cell phone number to send notifications on the latests posts. Just an email address will accomplish the goal.
Adding Messages
Once you’re finally done customizing your form and posting where you want it, be sure to add some messages or content to your Aweber “Follow Up Series”. The “Follow Up Series” will be the emails you want sent to your subscribers as soon as they join your list.
Follow Up Series
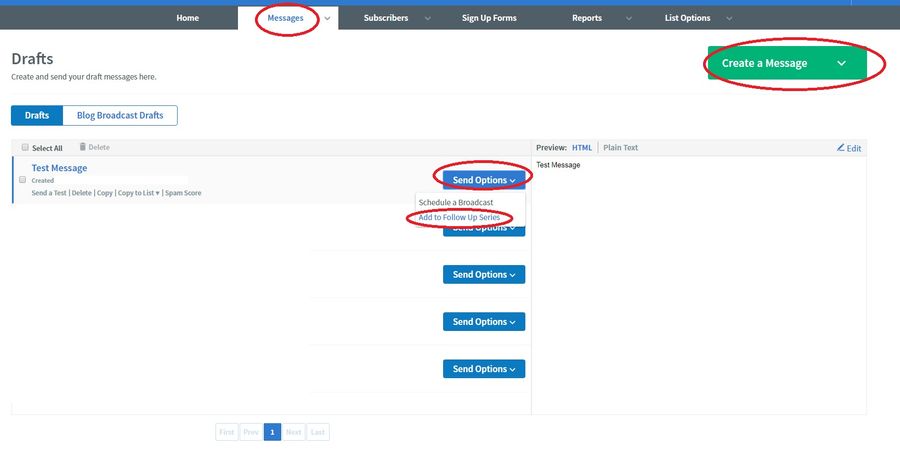
To create your first message, simply go to your Aweber dashboard by logging in. Then click on “Messages”. You will then click on “Create a Message”. Create your message to introduce yourself to your subscriber or add any gifts as applicable. Once you message is saved, click the “Send Options” in the messages’s dropdown menu and click “Add to Follow Up Series”. You’re message will then be sent to your new subscriber as soon as they join or depending on what options you set to send.
To get more tips like these, be sure to join our email list.
-Wisdom is shared here.
